
Are you excited about enhancing your operating system experience? Look no further than almalinux 9.4 kde install! This comprehensive guide will walk you through the entire installation process of this versatile Linux distribution. Whether you’re a tech-savvy individual or a beginner exploring new operating systems, prepare to dive into almalinux 9.4 kde install and unlock its full potential on your device. Let’s begin!
Step-by-Step Guide: How to Install almalinux 9.4 kde install
To successfully install almalinux 9.4 kde install on your computer, follow these steps:
1. Download the almalinux 9.4 kde install ISO
Start by navigating to the and downloading the ISO file for almalinux 9.4 kde install Make sure your internet connection is stable to avoid any interruptions during the download process.
2. Create a Bootable USB Drive
Once the ISO file is downloaded, the next step is to create a bootable USB drive. Utilize tools like or Etcher for this purpose. Insert a USB drive with at least 8GB of storage, select the downloaded ISO file, and follow the prompts to create your bootable USB drive.
3. Boot from the USB Drive
With your bootable USB prepared, insert it into your computer and restart the system. During startup, access your BIOS settings (usually by pressing keys like F2, F12, or DEL) and set the USB drive as the primary boot device. Save the settings and exit the BIOS menu to start the installation process.
4. Start the Installation Process
Once the system boots from the USB drive, the almalinux 9.4 kde install installation screen will appear. Follow the on-screen instructions to proceed with the installation:
- Select Language: Choose your preferred language for the installation process.
- Set Keyboard Layout: Select the keyboard layout that matches your setup.
- Select Installation Destination: Choose the disk where you want to install AlmaLinux.
- Configure Network: Connect to a network for updates and additional packages (optional but recommended).
- Begin Installation: Once all the settings are configured, click the “Begin Installation” button to start the installation.
5. Complete the Installation
The installation process will take a few minutes. During this time, you can set a root password and create a user account. Once the installation is complete, reboot your system. Remove the USB drive when prompted to avoid booting from it again.
Congratulations! You have successfully installed almalinux 9.4 kde install on your system.
Updates Policy
almalinux 9.4 kde install adheres to a comprehensive updates policy to ensure your system remains secure and up-to-date. Regular updates are crucial for enhancing performance, fixing bugs, and addressing potential vulnerabilities. AlmaLinux prioritizes stability without compromising security, allowing users to enjoy a reliable operating system optimized for better performance.
The updates policy of AlmaLinux ensures you receive the latest software patches and security fixes promptly. This means you can stay ahead of potential threats and enjoy an enhanced user experience with regular updates fromalmalinux 9.4 kde install.
Features
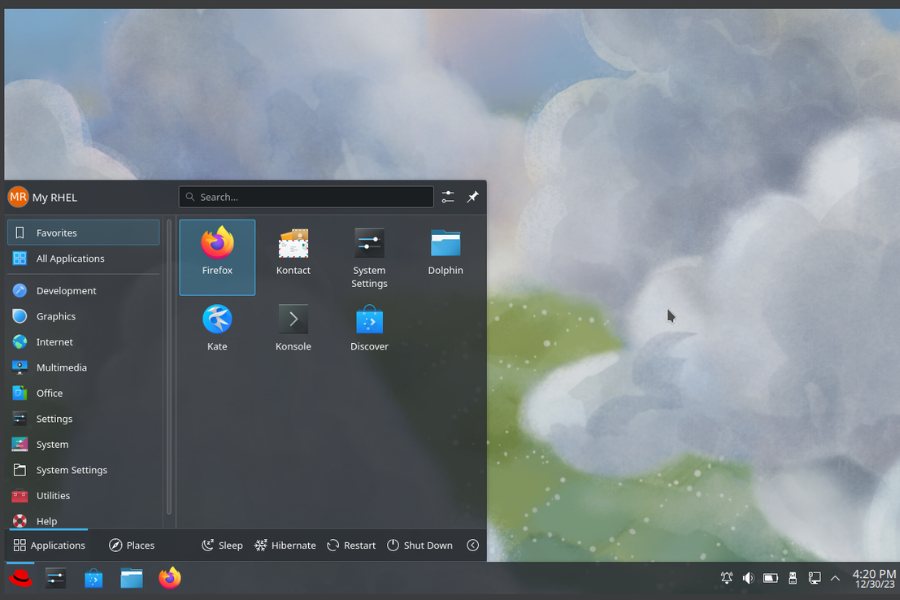
almalinux 9.4 kde install comes packed with exciting features that enhance user experience and productivity. One standout feature is the sleek and intuitive KDE desktop environment, offering a visually appealing interface with customizable widgets and themes to suit your preferences.
Key Features of almalinux 9.4 kde install:
- KDE Desktop Environment: Provides a modern, user-friendly interface with a wide range of customization options.
- Pre-Installed Applications: Comes with essential software like office suites, web browsers, multimedia players, and more.
- Enhanced Security: Regular updates and robust security measures protect your system from vulnerabilities.
- Customizable Themes: Offers various themes and widgets to personalize your desktop experience.
- Efficient System Performance: Optimized for smooth operation, even on older hardware.
Project Samples
Curious about the capabilities of almalinux 9.4 kde install? The project samples showcase a diverse range of projects successfully completed using this powerful operating system. From web development to graphic design, these samples demonstrate the versatility and efficiency of almalinux 9.4 kde install in real-world applications.
By exploring how other users have leveraged the features and tools offered by almalinux 9.4 kde installKDE, you can gain inspiration and insights into maximizing your productivity and creativity. These project samples highlight the endless possibilities that await you when you choose almalinux 9.4 kde install for your next endeavor.
Project Activity
The project activity of almalinux 9.4 kde install is dynamic and full of innovation. Developers are continuously working to enhance the user experience, fix bugs, and introduce new features. The community-driven nature of the project ensures that there is always something exciting happening behind the scenes.
Highlights of Project Activity:
- Regular Updates: Frequent updates ensure that users receive timely security patches and feature enhancements.
- Community Collaboration: A vibrant community of users and contributors actively engages in discussions, offers assistance, and contributes to the ongoing development of the project.
- Commitment to Excellence: The project activity reflects a dedication to excellence and continuous improvement, ensuring that user feedback is taken seriously and issues are addressed promptly.
Follow Custom almalinux 9.4 kde install Live ISO
For users looking to customize their almalinux 9.4 kde install experience, following the Custom almalinux 9.4 kde install Live ISO is the way to go. This tailored approach allows users to create a personalized operating system setup that meets their specific needs and preferences.
By opting for the custom ISO, users can handpick the software packages and configurations they desire, ensuring a streamlined and efficient installation process. Whether you’re a developer needing specific tools or a casual user wanting particular applications, this customization option offers flexibility.
Additional Project Details
When it comes to additional project details of almalinux 9.4 kde install, there are a few key points worth mentioning. The project offers extensive documentation and support resources for users looking to make the most of their experience with this distribution. From installation guides to troubleshooting tips, you’ll find all the information you need at your fingertips.
Moreover, almalinux 9.4 kde install also boasts a vibrant community of users and contributors who actively engage in discussions, offer assistance, and contribute to the ongoing development of the project. This sense of community collaboration adds an extra layer of value to the overall user experience.
Renewing Support for Upstream Deprecated Hardware
almalinux 9.4 kde installalmalinux 9.4 kde installeven older devices can benefit from the latest updates and features. This dedication reflects the project’s focus on inclusivity and accessibility, allowing users with various hardware configurations to experience the power of AlmaLinux.
By renewing support for deprecated hardware, AlmaLinux aims to extend the lifespan of older devices, promoting sustainability in technology usage. This approach not only benefits individual users but also contributes to reducing electronic waste by encouraging continued use of existing equipment.
Pitch In
Looking to get involved and contribute to the almalinux 9.4 kde install project? There are plenty of ways you can pitch in and make a difference! Whether you’re a developer, tester, designer, or simply passionate about open-source projects, there’s a place for you in the community.
You can help by testing new features, reporting bugs, or even creating documentation to improve user experience. Your contributions will not only benefit the project but also help shape the future of almalinux 9.4 kde install.
By pitching in and getting involved, you’ll have the opportunity to collaborate with like-minded individuals from around the world while playing a crucial role in supporting this innovative Linux distribution.
Conclusion: almalinux 9.4 kde install Install
That’s a wrap on our step-by-step guide for almalinux 9.4 kde install installation! We’ve covered everything from the updates policy to project activity and support for deprecated hardware. Remember, this versatile operating system offers a user-friendly KDE desktop environment packed with features.
By following the customalmalinux 9.4 kde install Live ISO instructions, you can tailor your installation to suit your specific needs. Don’t forget to explore additional project details and consider pitching in to contribute to this thriving open-source community.
almalinux 9.4 kde install provides a stable and secure platform that caters to both newcomers and seasoned Linux users alike. Ready to dive into the world of AlmaLinux? Get started today!
FAQs
Still have questions about installing almalinux 9.4 kde install? Check out these frequently asked questions for more information:
1. Can I upgrade from a previous version of almalinux 9.4 kde install?
Yes, upgrading your existing AlmaLinux installation to version 9.4 KDE is straightforward using the package manager. Follow the upgrade instructions provided on theto ensure a smooth transition.
2. Is it possible to dual-boot almalinux 9.4 kde install with another operating system?
Absolutely! You can set up a dual-boot configuration with Windows or any other operating system on your computer. During installation, select the option to install alongside another OS and follow the prompts to configure your dual-boot setup.
3. Will all my data be safe during the installation process?
As long as you follow the installation instructions carefully and back up your important data beforehand, your files should remain secure. It’s always recommended to perform a backup before making significant changes to your system.